A user sent me a post I created on a really old site I had talking about my first Oldsmobile; a 1970 Cutlass SX. I had to replace the water pump and took pictures along the way. I figured it was good information so I wanted to carry it over to here. Feel free to add your own tutorials!
Step 1 - Diagnosing the problem
I was driving my Cutlass around one day and suddenly I started hearing a strange, almost gurgling sound from under the hood. I didn't anything leaking when I popped the hood. I researched online and the overall consensus was that the water pump bearings were out and the pump needed to be replaced. Below is a video of what it looked liked.
Step 2 - Taking off the fan
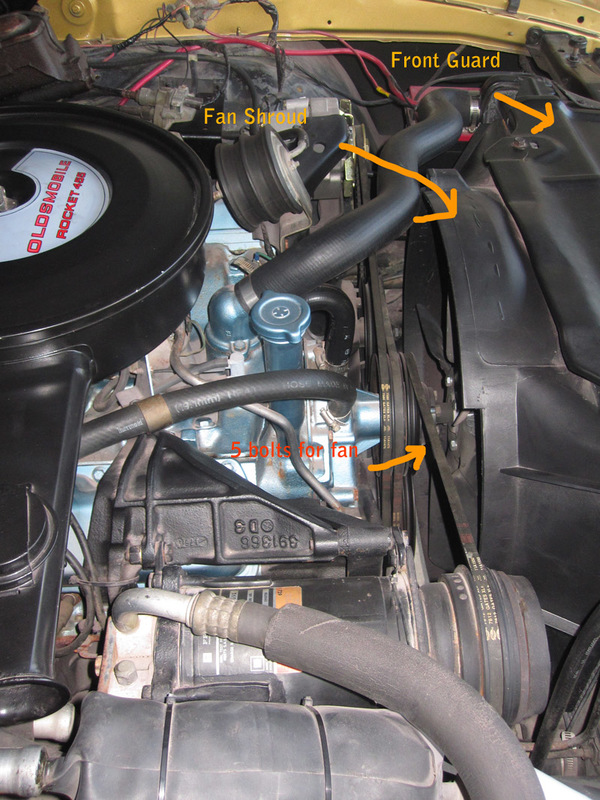
You now will need to take off the front "guard" (front metal piece) to get to the fan shroud (round plastic circle piece that goes around the fan). Taking off the front metal guard is easy. There are 6 bolts that keep that in, with a few of that that also keep in the fan shroud. Take the six out and set them aside. To completely unbolt the fan shroud, you will need to crawl under the car and remove two more bolts.
Now, the tricky part is you can't take out the shroud / fan guard without taking out the fan. You will now need to get to 5 smaller bolts with a wrench that connects the fan to the actual water pump. once you take those off, you should be able to pull the fan off the pump with the fan shroud too.
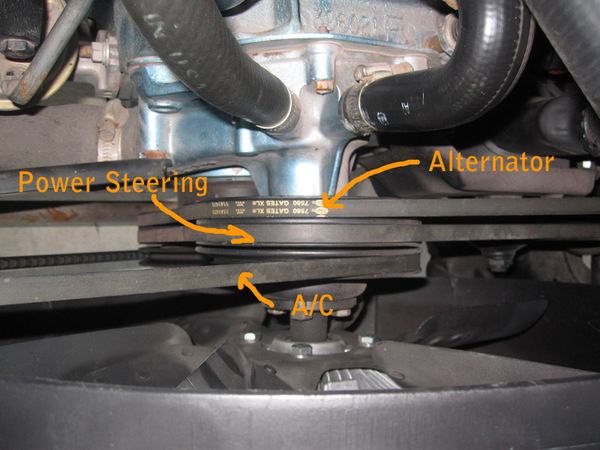
Step 3 - Taking off the beltsMake sure you take careful note of which belt goes where. My car has power steering and also A/C so my belts and water pump may be different. For me, starting from the back (closet to the driver seat) to the front is alternator, power steering, and A/C.
Taking off the A/C beltLoosen the top bolt circled in red. You do not to take it off. You will need to take out the bottom bolt. After that, you should be able to push down and towards the center which will give slack to pull off the A/C belt.
Taking off the power steering belt
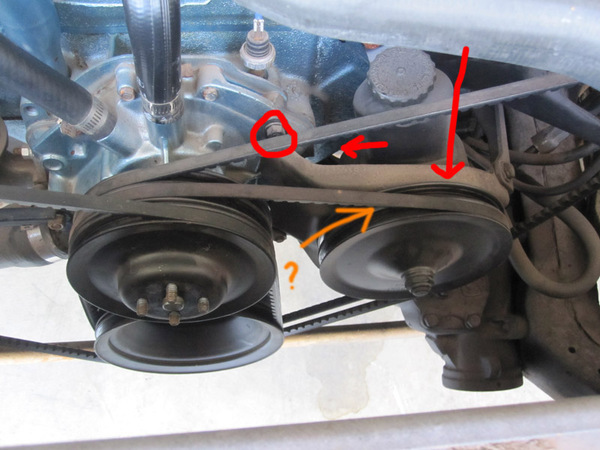
(ignore the orange error)
The one is the hardest out of the three. You will need a wrench (size 13 or 14 I think) to squeeze behind the pulley. That bolt is the adjustor. You may also need to loosen the bolt on the water pump, and the one under the car to shift the entire power steering set up. I did not actually remove it all, just shifted enough to get the belt off.
Taking off the alternator belt 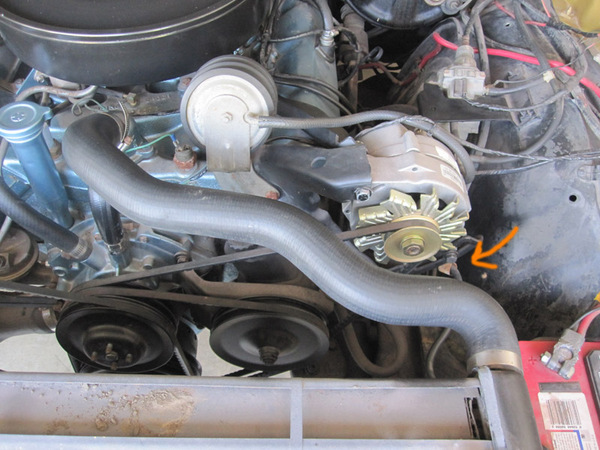
This is the easiest one. Simple just loosen the bolt on the adjustor to shift the alternator enough to remove the belt.All the belts should be off now.
Step 4 - Draining the Radiator
I disconnected the water pump end of the larger tube going from the radiator to the actually water pump. It is at the lower left section of the water pump. It was on there pretty good, so it might take some force to pull off. Make sure you have a large bucket underneath this section. I used a plastic sled and got about 3-4 gallons of fluid.
Step 5 - Taking off the rest of the tubes
There are two more tubes you need to remove. They are on the top of the water pump. One is for A/C and heating and the other is a by-pass tube. They should be fairly easy to take off.
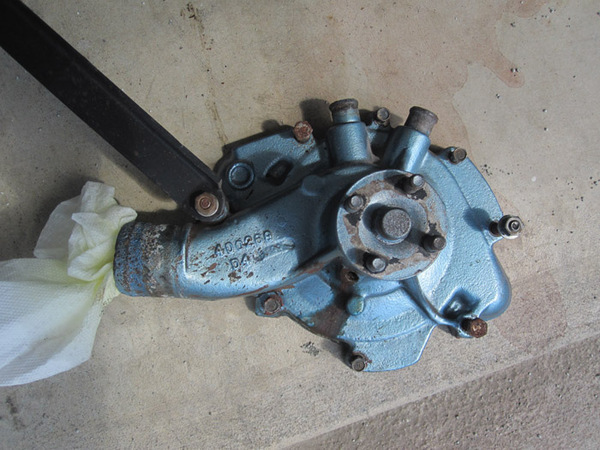
Step 6 - Removing the water pump
Take pictures of the water pump before you take it out to ensure you do not get confused on where the bolts go. A lot are different sizes and it is easy to mix them up. When I removed my old pump, I left the bolts where they were suppose to go so when I was ready to add the new pump, I just slipped the bolts in their correct spots one at a time. Carefully remove them all, a little more radiator fluid may come out. Once all the bolts are off, the water pump should just come out.
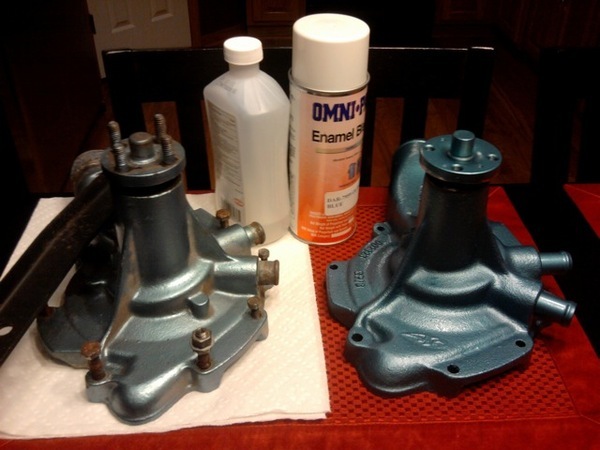
Step 7 - Paint new water pumpFirst, I bought a Duralast water pump from
autozone for $70. I wanted to have the correct blue color for my water pump. I used enamel paint. Unfortunately, as I did this I found out that my engine was actually the wrong shade of blue. Oh well. I added two coats of paint.
You will now need to take the 4 bolts that the fan were on off from the old pump to put on the new one. This was pretty tough for me. I had to use a socket set and bolt on two nuts and use the pressure from those bolts to unscrew the bolt.
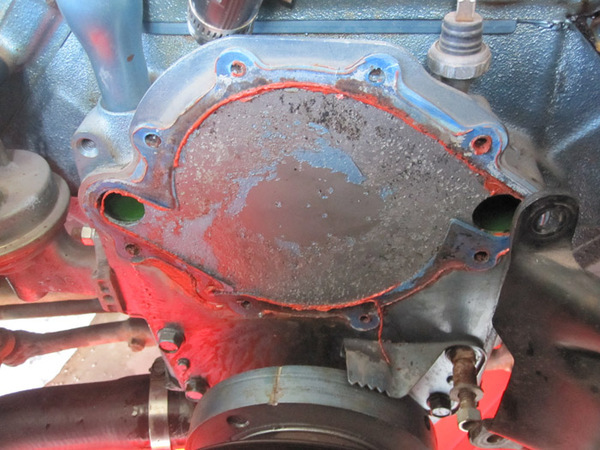
Step 8 - Scraping the old gasket off
With a paint scraper, make sure you clean off the old gasket and any other crap that may be on the old engine. Below is a picture of my engine with the left over gasket stuff that I had to scrap off.
Step 9 - Preparing the new gasketWhen you buy a new water pump, it should also include the gasket. You will also need to buy a small tube of water pump sealant. I placed the sealant on one side of a gasket and then aligned it to the new water pump. Then place more sealant on the outside end of the gasket (the side that is going to connect to the engine).
Step 10 - Connect the new water pump
Carefully align and put the new water pump on the engine block. Place the bolts back where they are suppose to go enough just to hold in the new water pump. Start tightening them with a socket set but don't overdue it.
Step 11 - Reverse Start going backwards on the steps.
Put the belts back and make sure you have them pretty tight. The first time I didn't have my alternator belt on tight enough and it jumped off the pulley. Put the fan and fan shroud back.
Step 12 - Put back in the radiator fluid
Pour it all back in. (Note: After you fill it, you will need to start your car again with the heat on and then pour some more in to ensure that it circulated through all the engine)
Step 13 - Starting the car
Instead of instructions, I'll just explain my experience. The first attempt of starting it, I heard a popping sound and saw a little pit of smoke coming from the engine. I stopped. Five minutes later I tried again and it sounded a little more healthy, but again I saw a little smoke and then stopped. The third time, it cranked right up. It sounded so much better then normal and was working just great. I test drove it and it looks like a successful change.
Many thanks to the readers at
classicoldsmobile.com for helping me out with this. If anyone has questions, please contact me and I would be happy to help.