Recently AddedFor Sale
-
$49,900
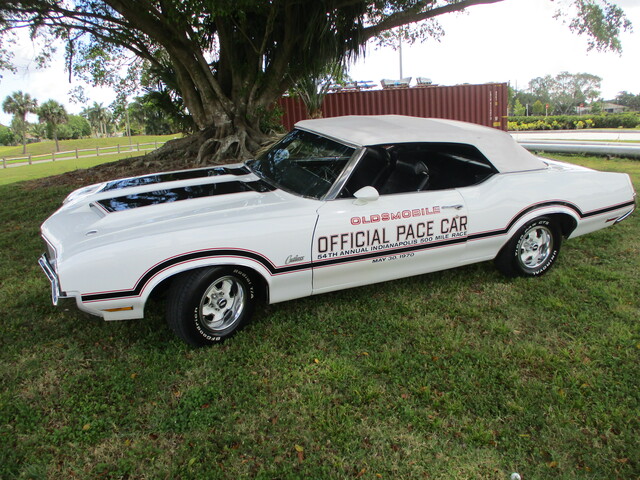
1 OWNER 1970 PACE CAR
THIS IS A ONE OWNER 1970 OLDSMOBILE CUTLASS SUPREME Y74 INDIANAPOLIS 500 PACE CAR CONVERTIBLE!! BOUGHT LOCALLY AT KING OLDSMOBILE IN FT.LAUDERDALE FLORIDA WHERE IT SPENT ALL ITS LIFE!! THIS IS ONE OF 358 THAT WHERE MADE!! 82,000 ORIGINAL MILES! LOADED WITH OPTIONS! POWER STEERING,POWER BRAKES,POWER ... -
$13,500
Oldsmobile
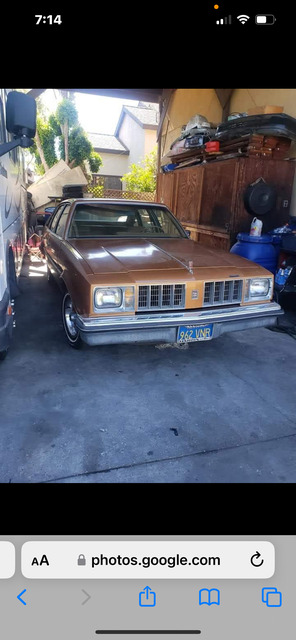
1978 Oldsmobile cutlass salon Sat in a garage for 25 years has 34,000 original miles. inside is untouched everything is complete. There is not a crack anywhere the car is in very good condition. Has the original jack and spare tire… i’ve never seen one of these anywhere on the road. Any car ... -
$13,500
Oldsmobile
1978 Oldsmobile cutlass salon Sat in a garage for 25 years has 34,000 original miles. inside is untouched everything is complete. There is not a crack anywhere the car is in very good condition. Has the original jack and spare tire… i’ve never seen one of these anywhere on the road. Any car ... -
$19,900
1983 Oldsmobile Cutlass Supreme
1983 Cutlass Supreme Canada car 305 not 307 V8 Clean Texas title 71k miles Rally Gauges Dual exhaust Runs and drives great! New parts: Staggered 18” Torque Thrust wheels with Continental Tires (Have factory wheels with new tires as well for less) Kenwood Bluetooth stereo 3.5” dash ... -
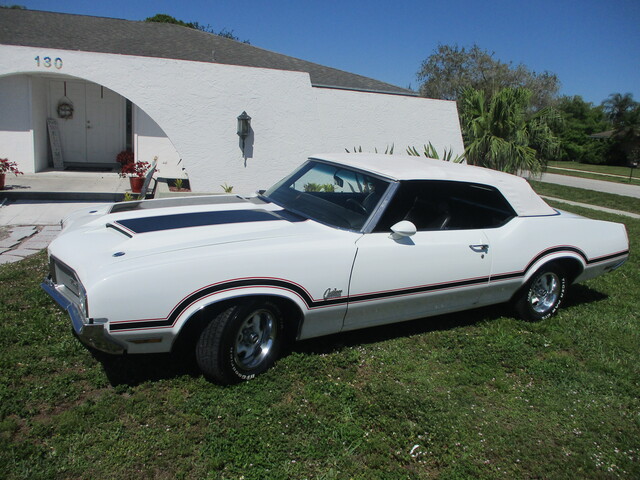
$79,900
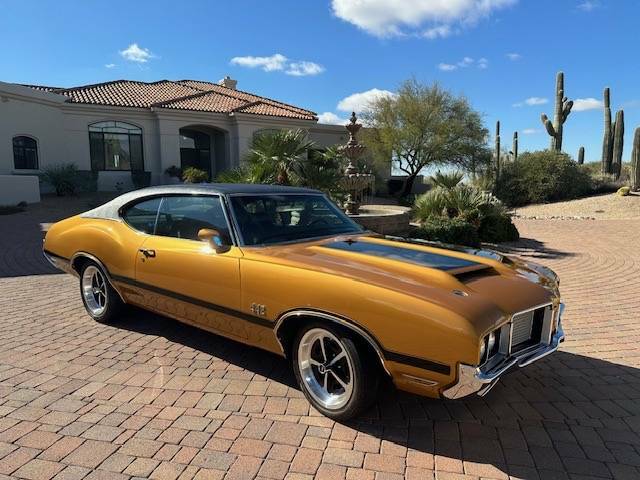
1972 Oldsmobile 442
This outstanding 442 is being offered from a private collection in Scottsdale Arizona, where it has been owned for 20 years. The car has the honor of being selected for the cover of Hemmings Muscle Machines magazine in March 2021. Within the magazine, it contains a great article of this amazing ... -
$6,850
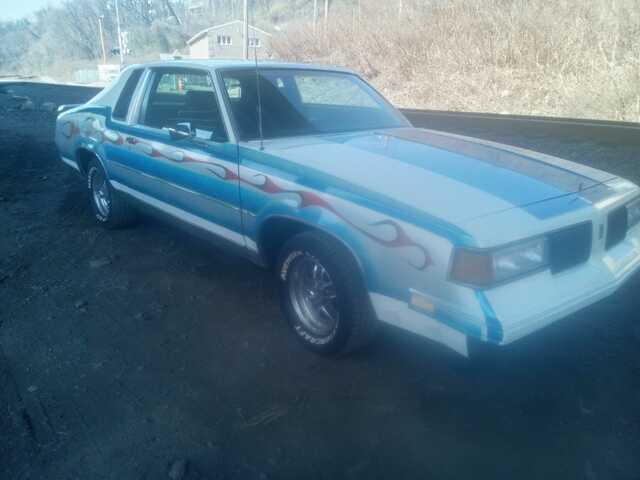
1987 Cutlass V8
1987 Cutlass 8 Auto runs good! New rotors, Pad, Rear shoes, drums, Brake Lines, and hoses, New water pump. Factory Bucket seat car and console. Needs minor things, cracked windshield some chrome missing. Pictures tell the rest of the story asking $6850 cant text phone call only! 412-583-5836 ... -
$49,900
1 OWNER 1970 PACE CAR
THIS IS A ONE OWNER 1970 OLDSMOBILE CUTLASS SUPREME Y74 INDIANAPOLIS 500 PACE CAR CONVERTIBLE!! BOUGHT LOCALLY AT KING OLDSMOBILE IN FT.LAUDERDALE FLORIDA WHERE IT SPENT ALL ITS LIFE!! THIS IS ONE OF 358 THAT WHERE MADE!! 82,000 ORIGINAL MILES! LOADED WITH OPTIONS! POWER STEERING,POWER BRAKES,POWER ... -
$17,500
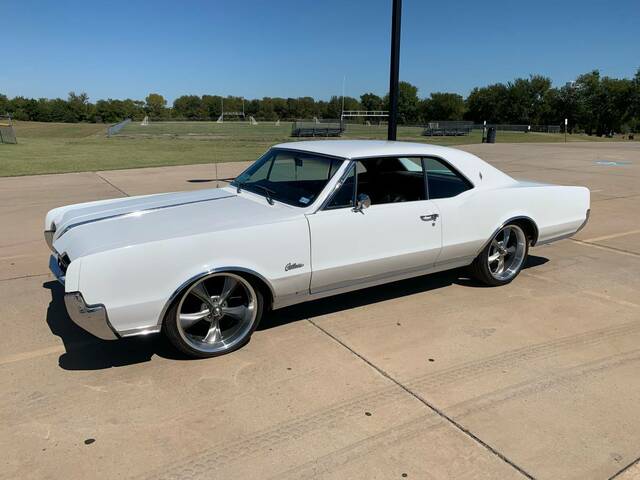
1967 Cutlass Supreme
5.4L 330 V8; 2 speed automatic transmission; factory AC car; power steering; power brakes; drum brakes; Holley carburetor; HEI ignition; dual exhaust; 20” Riddler wheels; tire tread 80%; KYB shocks; new hubs and bearings on front; clear blue Texas tile in my name Pros: Turn key classic daily ...
On the BoardsForums
 Is there any way to log out.
- 1970 Oldsmobile 442 Project - $6,000
- 1977 Oldsmobile 442 - $14,500
- 1976 Oldsmobile Cutlass Supreme 442 -...
- 1977 442 - $16,900
